Install Clarkconnect En 4.2
การติดตั้ง Clarkconnect En 4.2
Minimum Requirements
Processor/CPU
Up to four processors - Pentium, Celeron, AMD (see guidelines below)
Memory/RAM
At least 512 MB is recommended (see guidelines below)
Hard Disk
At least 1 GB is recommended (see guidelines below)
CD-ROM Drive
Required for installation only
Video Card
Any video card
Floppy Drive
Not required
Sound Card
Not required
Mouse
Not required
Monitor and Keyboard
Required for installation only
Broadband
Ethernet, cable, DSL or wireless connection
Network Cards
PCI, ISA or PCMCIA Wireless
RAM and CPU
5< user : cpu 500 MHz ram 512 MB
5-10 users : cpu 1 GHz ram 1 GB
10-50 users : cpu 2 GHz ram 1.5 GB
50-200 users : cpu 3 GHz ram 2 GB
Network Diagram

Being
 1. Go to the Bios setup change CD-ROM to first boot.
 2. Choose "Exit and saving change" and press "Yes" for save Bios.
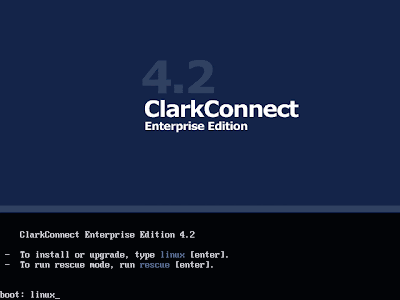
3. A greeting and prompt will be displayed askingyou what you want to do. For a new install or to upgrade an older version, type .linux..
 4. Choose language
 5. Choose Keyboard type
 6. Choose "Local CDROM" and press "OK"
 7. Choose "Install" and press "OK"
 8. Type "linux" and press "OK"
 9. Select "Gateway mode"
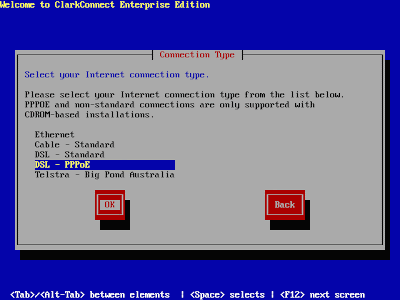
10. ClarkConnect natively supports five broadband connections. If you use DSL PPPoE select "DSL - PPPoE" press "OK"
 11. Type username,password,nameserver form your ISP.
 12. Ipaddress of Lan

13. Host and Domain
 14. select a timezone to match your geographic location in the world.
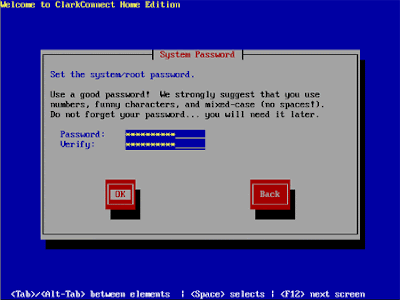
Input root password.
 15. Select "Use Default" press "OK"

16. Select module you want to install
 17. Select module you want to install
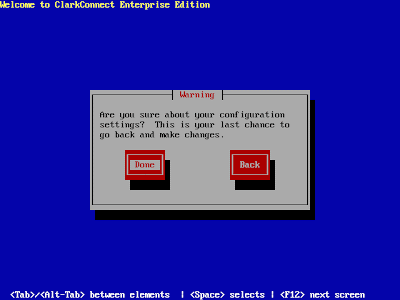
18. At this stage, you are asked to confirm your configuration settings and move on to the second stage installer. This is the last opportunity to abort the install and retain any data on the destination harddisks.
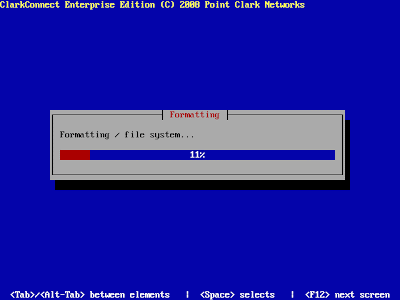
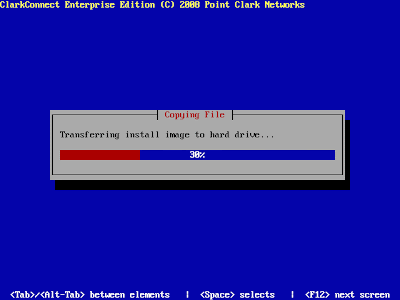

19. The second stage installer takes between 5 and 30 minutes depending on the modules you'veselected to install by default and your server's hardware specifications.

20. Upon completion, you will be asked to remove any CD-ROMs and reboot. Congratulations - your ClarkConnect server installation is complete.
 21. Go to the Bios setup change Hard Drive to first boot.
 22. Choose "Exit and saving change" and press "Yes" for save Bios.
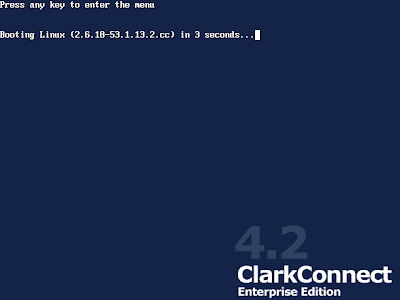

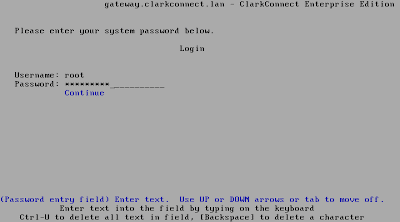
23. login with root password
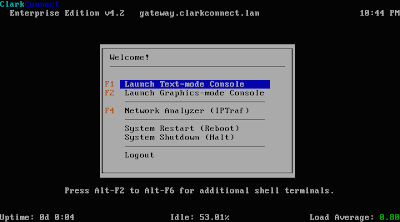
 24. Text mode console
 25. You can access to webconfig "https://ipaddress:81 ex. https://10.0.0.54:81/
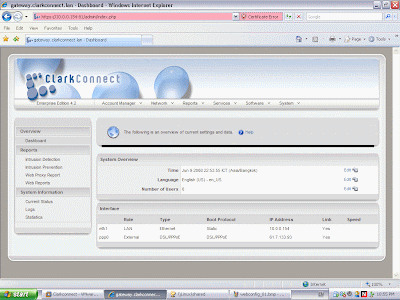
26. Screen shot webconfig. Success Install Clarkconnect.

 You must open port 80 for access from external network. Go to Menu "Network >> Incomming " look at "Add Firewall Rule" for Standard Services select "HTTP" and click "Add"
  Output


